Debbie Vail, NC
  • Health
  • Classes
  • About
  • Contact
  • Auburn Food Buying Club
  • Resources

Emerald City Soup

1/30/2013

1 Comment

 
Picture

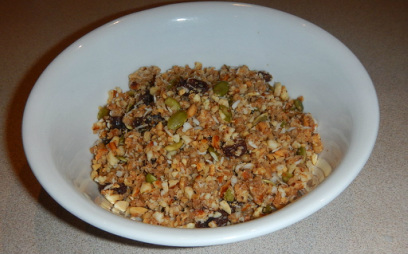
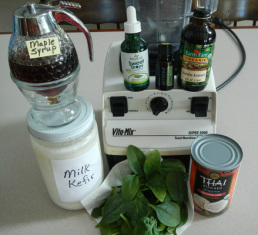
I am student at Hawthorn University in Nutrition Consultation.  My assignment sometimes includes preparing, eating and critiquing a recipe.  Included in this 3 credit hour course is a recipe by The Inner Cook – Rebecca Katz's, Emerald City Soup.  I adapted it for my small family size by cutting the ingredients in half as I have it listed here.  I also added a can of Coconut Milk which really made it outstanding. For crunch, I added corn tortillas.  (I use Green Mountain Gringo organic).   I am excited to share it with you:
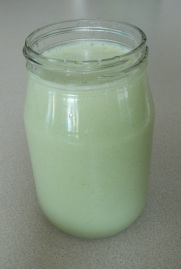


Print Friendly and PDF
Emerald City Soup

(Use organic ingredients if possible.)

1    Bunch Broccoli, washed and cut into pieces
2    Tablespoons Extra Virgin Olive Oil
1    Small Onion, chopped
1    Clove Garlic, minced 
1/4 Teaspoon Red Pepper Flakes
      Kale, cut into pieces (I used about 4 leaves)
4   Cups Broth (Vegetable, Chicken or Beef)* see note below
1   Tablespoon Lemon Juice
     Sea Salt to taste
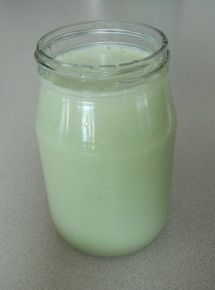
1   Can Coconut Milk (unsweetened and not the Lite version)

Blanch broccoli in hot water for 30 seconds.  Drain in colander and immediately immerse in a bowl of ice water to retain its bright color.

Heat olive oil in skillet on medium and saute’ onion with a pinch of salt until translucent.  Add the minced garlic and red pepper flakes and saute’ for 30 seconds more.  Add the chopped kale with another pinch of salt and cook one minute until the kale turns bring green.  Immediately remove from heat.

In a blender, blend half of the broccoli, Broth, and Kale mixture until smooth.  When the color changes from pale green to vivid emerald, that’s your cue to turn off the blender.  Pour into a pot, and blend the second half, adding it to the pot as well. 

Add the lemon juice, salt and can of coconut milk.  

Stir and heat the soup very slowly over low heat.  If not salty enough, salt to taste.  Serve immediately in colorful bowls or soup mugs and top with tortillas and extra red pepper flakes if desired.

If it needs to made in advance, heat it slowly, or it will lose its emerald green color and turn muddy.

Serves 3

Emerald City Soup does not freeze well, as it will not retain its vibrant green color.  The soup can, however, be kept for 1 or 2 days in the refrigerator.

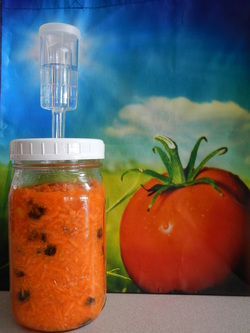
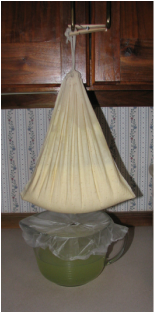
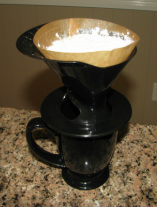
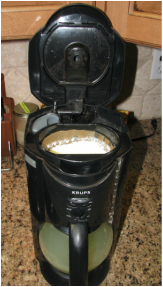
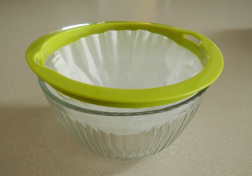
Note about Broth:  Homemade broth is much better than buying store bought broth that is loaded with neurotoxic MSG. Bone broth contains many minerals the body can use.  Simply put a chicken in a crock pot.  Debone the chicken when done, and place the bones back in the crockpot with the broth, adding more water and a Tablespoon of Apple Cider Vinegar (this will help dissolve the minerals in the bone.  Slowly cook for a day or two until bones are soft and crumbly (the bones will be soft enough for the family pet to enjoy).  Strain and store in jars or containers and freeze for use in recipes such as Emerald City Soup.  Once cooled in jars, the fat will collect at the top.  This can be removed once chilled in the refrigerator.  
1 Comment

No Bake Grain Free Breakfast Cereal

1/29/2013

5 Comments

 
Picture
This no bake, grain free cereal substitute, is a favorite at my house.  We just love it for a "no time to cook" breakfast, or night time "all in one bowl" meal.  This is perfect for those who must avoid grains also.  

There is a recipe but any ingredient can be substituted and amounts can be increased or decreased.  

The only equipment needed is a food processor, and a nice 7-cup size is one that I find perfectly suited for this job, and most jobs in the kitchen - not too big nor too small.


Print Friendly and PDF
No Bake Grain Free Breakfast Cereal
(Use organic raw ingredients if you can)

3   Cups Almonds
3   Cups Walnuts
3   Cups Cashews
1   Cup Pumpkin Seed
2   Cups Raisins, cranberries, or other dried fruit
1   Cup Shredded Unsweetned Coconut
1/4 to 1/2   Cup Coconut Oil
1/4   Cup Honey or Maple Syrup, or use less if using part Liquid Stevia Drops
1   Tablespoon Vanilla Flavoring
1   Tablespoon Cinnamon
1 1/2  Teaspoon Celtic Sea Salt -Fine Grind. (If you use regular table salt cut back to 1 teaspoon.  Regular table salt is not advised, is more refined, and may have additives.)

Grind nuts in a food processor.  Most people like bigger chunks but I do not.  Notice in my picture that the nuts are ground much finer- labor saver for your teeth.  I grind the nuts separately because they are different densities. The almonds are much harder than the walnuts and cashews, so they will take longer to grind, but you can grind the cashews and walnuts together.  

Place nuts in a large bowl, then add the pumpkin seed, raisins, and shredded coconut.  

In a small saucepan, add the coconut oil, honey, vanilla flavoring, cinnamon and sea salt.  Heat just enough to meld together, and pour over nut mixture.  Mix well.

Taste to see if you like the sweetness; if not, add more.

Store in airtight container.  I use canning jars.  Keep in refrigerator.

Serve with milk, nut milks, yogurt, fresh berries, etc.  I like coconut milk (see amazon link for a brand of coconut milk that comes in BPA free cans and contains more fat per serving than most other brands. 

A word about nuts and seeds from Nourishing Traditions cookbook:  "Nuts are easier to digest, and their nutrients more readily available, if they are first soaked in salt water overnight, then dried in a warm oven. Salt in soaking water activates enzymes that neutralize enzyme inhibitors." (page 512) The nuts and pumpkin seed in this recipe can all be placed in a large bowl covered with water, with 2 tablespoons sea salt added and stirred til mixed.  Soak overnight, drain, dry out in dehydrator or place on parchment lined sheets and place in oven on lowest setting for 12 to 24 hours, stirring occasionally.

Click here for another fabulous Seed and Nut Granola Recipe

See World's Healthiest Foods for a different opinion on soaking nuts.

Thanks to Healthy Home Economist for this wonderful recipe that I have used many, many times.

5 Comments

Earth Fare, Auburn, Alabama Hosts Fermentation Class

1/22/2013

2 Comments

 
Picture
Eleven Students enjoyed the educational accommodations and the generosity of Earth Fare for two hours as they learned how to make the most nutritious and versatile milk kefir, and how to preserve their fruits and vegetables with lacto-fermentation.  

This class is very intensive for me and most of the time I forget to take pictures as was the case for this class.  Being that I have no pictures of my students, I would at least like to mention their names here:  LuAnn Tudela, Emma Galarraga, Yvonne Williams, Kristin Vordenbaum, Susan Ledbetter, Sally Dumas, June Dean, Wendy Hansen, Kalli Kenney, Jenni Hunt, and Amanda Davis.  LuAnn and Emma traveled from Atlanta to be present for this class.  Wow!  I'm humbled.

I would like to thank Brooke Peace, Community Relations Manager, at Earth Fare, and for the freebies given to the class.  Everyone received free totes, organic raisins, sea salt 
and a coupon for $5 off.  They also took home a pint of gingered carrots and the milk kefir
                                               grains.

The class opened with prayer, thanking God for His amazing creation of food to nourish our bodies.  Everyone sampled many products made from milk kefir and whey, then we had a discussion of how to make kefir and care for the grains.


Picture


I made a very nutritious Coconut Kefir Lime Cooler (non-alcoholic) and challenged the class to figure out how I made it look so green.  Everyone really liked this vitamin and enzyme rich power packed drink.   


Picture
After the taste samples and the milk kefir discussion, the class  was directed to start work on their take home project - Lacto-Fermented Raisin Gingered Carrots.  Earth Fare provided large bowls for each student and I had brought grated carrots for them to put in their bowls, along with the other ingredients to make this project.  

Lacto-fermented products require whey, which is derived from milk kefir.  There are many ways to extract whey from milk kefir, yogurt, or clabbered milk.

I enjoyed this class and it was a lot of fun as we all learned about the microscopic world of bacteria and yeasts and the many benefits that it imparts to our health, namely our immune system.  

Thank you, class :) 

2 Comments

Lacto-Fermented Gingered Raisin Carrots

1/22/2013

2 Comments

 
Print Friendly and PDF
Picture

Some people do not like the tart taste of lacto-fermented products, but this recipe will is milder and liked by even the most hard to please taste buds. 

Lacto-Fermented Gingered Raisin Carrots  -  Makes 1 Pint

1       Bag Organic Baby Carrots (use 12 ounces) grated in a food processor
2       Teaspoons Freshly Grated Ginger Root or less to taste
1/2    Cup Organic Raisins
1       Teaspoons Celtic Sea Salt
3       Tablespoons Whey


Picture
Put all in a bowl and pound or mash with a spoon or mallet to draw the juice out of the carrots.  Then press into a wide mouth pint sized canning jar for an air tight seal leaving one inch of space at the top.  Leave on counter for about 3 days.  If you do not have an airlock lid as shown in the picture, then you will need to burp the jar about twice per day.  Store in refrigerator after 3 days.  
If you do not have the time to grate fresh ginger, there is a brand that is organic and minced in a small jar.  
Check out these fermentation tools and supplies

2 Comments

Coconut Kefir Lime Cooler (non-alcoholic)

1/20/2013

0 Comments

 
Picture
Nutrition in a glass!  It's packed with vitamins and enzymes, quick to make, and oh so good!  Can you guess why it's so green?  Your kids will never know.   No need to wonder long, here's the recipe:

In a blender add:    (2-3 Servings)

1   Handful Fresh Organic Spinach Leaves
1   Quart Milk Kefir or Plain Yogurt (unsweetned)
1   Can Unsweetened Coconut Milk
2   Tablespoons Maple Syrup
1   Dropper Full of Sweet Leaf Brand Liquid Stevia
1   Teaspoon Vanilla Flavoring
5   Drops of lime essential oil  

Print Friendly and PDF
Picture

Blend until smooth and chill.  Can't wait to chill?, then add a few ice cubes to the blender.  If you don't have the oil, then use fresh squeezed lime juice.  Adjust any ingredient to your taste.

Anything with lime in it should be green - eye appealing, right?  Spinach to the rescue, and it certainly adds some green vegetable to our diet, which lacks in this area.

Enjoy!  I know you will.
Check out these Milk Kefir tools and supplies.

0 Comments

How To Get Whey - Many Ways

1/19/2013

1 Comment

 
Picture
I would like to show you many ways that you can strain whey from your milk kefir, yogurt, or clabbered milk.  For use in lacto-fermentation, whey must always be derived from live fermented dairy products that have not been heated.

I use this drawstring cloth bag sometimes, especially when I want to obtain a large amount of whey.  Notice that I have tied and secured it from my cabinet door (many would advise against this because it may make the door sag or the hinge to get crooked).  But this is the way that I do it regardless, and haven't had any trouble yet.  I used a clothes pin attached to the handle and the drawstring bag.  Notice that I have cling wrap covering my bowl.  I only poked a little hole where the whey is dripping into the bowl.  This will help keep out gnats or fruit flies.

Picture
In this picture, you see that I am using an individual cup coffee brew device.  Just line it with a coffee filter as you would when brewing the coffee.  This method would be used to obtain a small amount of whey.  so easy and to do and easy clean-up

Picture
In this picture, you can see that I am using a large coffee maker.  All you need to do is place the coffee filter in the coffee maker, pour in your milk kefir, yogurt, or clabbered milk, and let it catch in the coffee pot.  No electricity used for doing this.  

And of course, it's best to use non bleach coffee filters if you can.

Picture
In this picture, I just have a plastic strainer over the top of a glass bowl.  I lined it with a coffee filter.

After your whey is finished dripping, take the coffee filter out and lay flat on a paper towel.  You can get a spoon and scoop all the kefir cheese left in the filter.  

Picture
This is a nice little device for obtaining a small amount of whey.  Works great with thicker yogurts but if using the thinner milk kefir, it would need to be lined with a coffee filter or clean fine mesh cloth.  It has it's own little drip container and a lid that you can place over the top to keep pests out.  It's even small enough to store in the refrigerator while it is dripping.

1 Comment
    Picture
    Debbie Vail, NC
    ​Greetings from east central Alabama and welcome to my site.  I am a graduate of Hawthorn University, a leader in holistic education.  
    See more about me and my educational experience. 

    Enter your email address:

    Delivered by FeedBurner

    Picture
    Berkey Water Filters
    I love mine!  Check it out 

    Categories

    All
    About Nutrition
    Baked Oatmeal
    Bpa
    Bvo
    Candy
    Coconut Lime Cooler
    Crackers
    Dessert
    Detox
    Eggs
    Exercise
    Fats
    Flame Retardant In Drinks
    Fluoride
    Garden
    Gm Foods
    Grain Free
    Green Drink
    Herbal Tea
    Juicing
    Lacto Ferm. Carrots
    Lacto-ferm. Pickles
    Lacto-ferm. Salsa
    Milk
    Msg
    Organic
    Pancakes
    Pet Food
    Quinoa
    Soda Alternatives
    Soup
    Sprouted Grain
    Squash Puppies
    Students Learn
    Sweetners
    Toxins
    Vitamin C
    Vitamin D
    Water Filter
    West Nile Virus
    Where Do I Start
    Whey

    Archives

    March 2017
    November 2015
    April 2014
    February 2014
    November 2013
    October 2013
    September 2013
    August 2013
    June 2013
    May 2013
    April 2013
    March 2013
    February 2013
    January 2013
    November 2012
    September 2012
    August 2012
    July 2012
    June 2012
    May 2012
    April 2012

    Subscribe to Updates from Debbie Vail, NC
Powered by Create your own unique website with customizable templates.